| WOOLGATHERERS - Warping a loom | |||||
|
Warping a loom |
||
To set up a loom for weaving requires 5 steps in a particular order: |
||
1 |
Calculate, measure and secure warp material. |
|
2 |
Wind warp material securely with even tension on the warp beam. |
|
3 |
Thread the heddles according to the planned pattern or structure |
|
4 |
Sley reed with planned density. |
|
5 |
Tie the warp ends to the cloth beam with even tension. |
|
| There can be infinite variation in how any of these steps can be completed – but their completion and sequence cannot be changed or significant problems will arise. | ||
This method is universally applicable and nearly universally applied. The only exception comes for modern “hobby” weavers who believe that 1, 4, 3, 2, 5 also works. While some short warps with coarse threads and only one thread per dent in the reed may produce fabric, this method does not produce effective results when applied to fine threads, multiple threads per dent in the reed, long warps, wide warps… Per Mary Atwater in "Shuttle-Craft Book of American Hand-Weaving" - p. 82-ff. Sectional warping is her preferred method, chained plain beam warping by winding the warp on the beam using a raddle second, and working from the front of the loom going first through the reed and heddles before winding on, p. 87. "is perhaps the worst way of warping, but may result in a weaveable warp if enough care is taken and the warp material is strong enough to stand it."
|
||
Since warping a loom is a time consuming step and vitally important to producing quality fabric, it makes little sense to spend time learning a method with limited use. Far more practical and effective is learning how to apply steps 1-5, in that order to equipment already owned by the weaver. When warping becomes a formula applicable to everything in the studio, the weaver has much more time and energy to put into project planning and original design. |
||
| How does this apply? | ||
| Example A: Industrial Loom | ||
| Warp threads are put on a creel and using an industrial warper applied with even tension to a metal warp beam. [Steps 1 & 2] |  |
|
| The warp beam is then brought to the loom with a forklift or crane and put into position. | 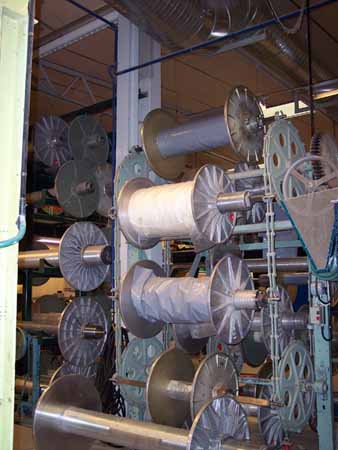 |
|
| The warp ends – with a cross and lease rods are knotted onto the ends of the previous warp behind the heddles. If this is a new pattern, the heddles are sleyed by hand. [Step 3] | 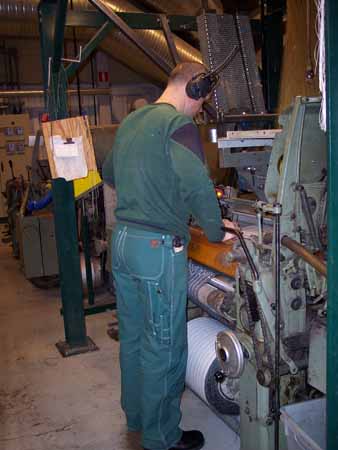 |
|
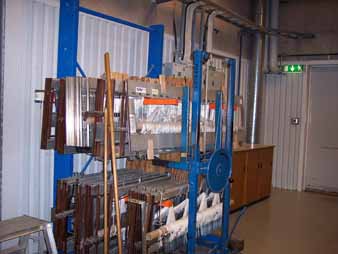
If the warp is being knotted, the reed was sleyed the first time that pattern was set up. Otherwise, the reed is sleyed. [Step 4] The warp ends are tied onto the apron rod with even tension. [Step 5] |
 |
|
| Example B: Rigid Heddle Loom [Rowena Hart method] | ||
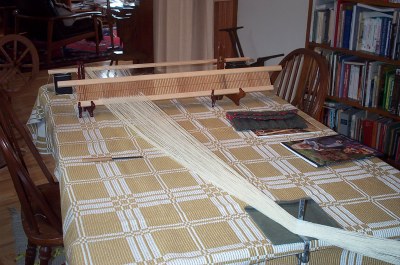
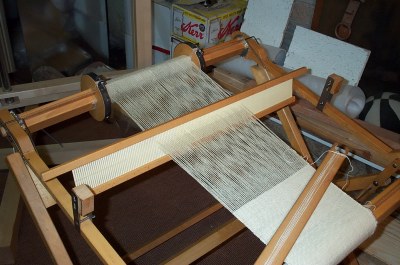
Warp material is measured and secured by bringing loops of warp material through the slits and anchoring them on the warping peg, which is mounted to give the correct warp length. Warp is securely tied when complete. [Step 1] Warp is beamed onto warp beam under tension. [Step 2] |
 |
|
Warp ends are cut and one of each pair is threaded through the hole (heddle). [Step 3 and 4 since there is no separate reed] Warp ends are tied onto apron bar with even tension. [Step 5] |
 |
|
| Example C: Traditional Countermarche Floor Loom, Counterbalance Loom, Jack Loom, Table Loom | ||
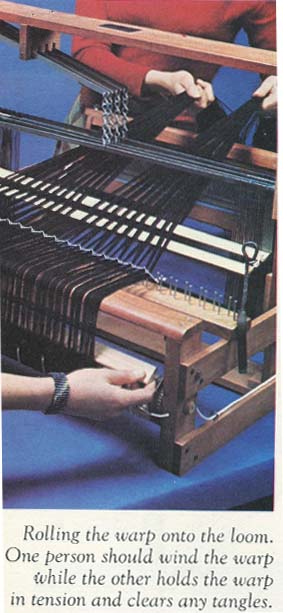
Warp is beamed on a warping board or mill with one or two crosses, choke tied and removed. [Step 1] Using a raddle to space the warp to reeded width, the uncut warp ends are slid onto the apron rod and the warp is beamed with even tension. [Step 2] Moving the lease sticks to a convenient spot behind the shaft frames, the warp is cut and the threads inserted into the heddles in the proper order to achieve the planned pattern/structure. [Step 3] The reed is hung from the castle and sleyed. [Step 4] The ends of the warp are tied to the apron rod under even tension. [Step 5] |
 |
|
|
||
| Example D: Warp Weighted Loom | ||
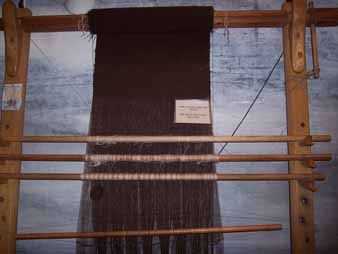
Warp is prepared by creating a woven band with the warp ends securely fastened in the proper sett. Band is than fixed to the upper beam. The weaving width is fixed by the band attachment and weft twining.[Steps 1 and 2] Heddling bars are created by wrapping a continuous string heddle around selected warp threads. [Step 3/4 - no separate reed used.] The ends of the warp are tied to the apron rod under even tension. [Step 5]
|
 |
|
| Tension is adjusted on the weights. [Step 5] | 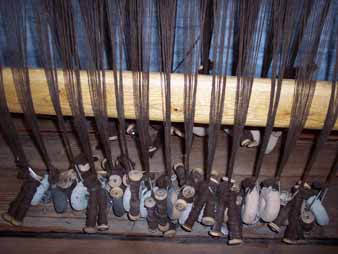 |
|
|
||
| Example E: Sectional Beaming | ||
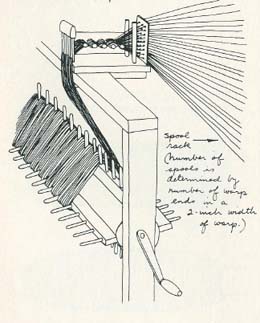
Calculate warp material. Wind several warp spools or prepare a section bout on warping wheel or mill. [Step 1]
|
||
Wind bout on warp beam counting rotations and keeping even tension. Continue until proper number of bouts has been warped. [Step 2] Form or keep cross and thread heddles in proper sequence. [Step 3] Sley reed. [Step 4] Tie warp ends on to apron bar using even tension. [Step 5] |
 |
|
| As you can see, the process and sequence remain the same. The application and tools can and do change. Whether to use a coarse reed or a raddle to keep the reeded width when beaming is not indicative of a “different method”, but a different form of execution. Where and how to hang the lease sticks, whether to use shoelaces or thrums to tie the lease sticks together, what to use to keep the warp chain under even tension when beaming, warping trapezes, whether to use a mill or a board to chain a warp – these are all choices related to the manner of execution, not totally different methods. | ||
| The common argument of “personal preference” does NOT apply to the basics. Personal preference enters the picture when deciding how best to execute the basic process and sequence. | ||
